Best Paint For Bathroom Cabinets
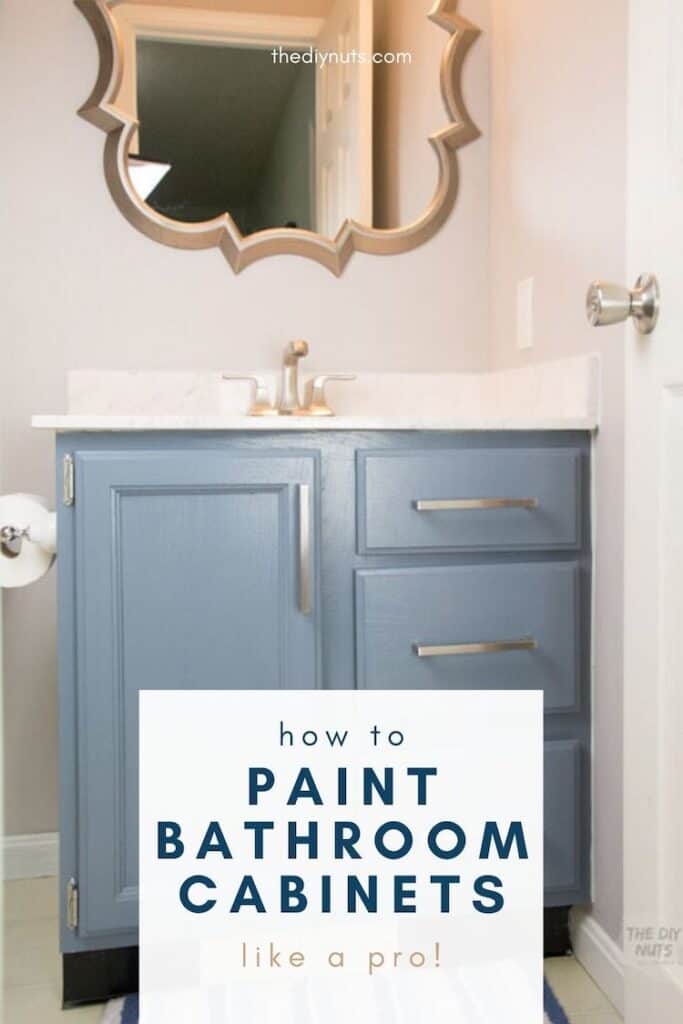
Learn how to paint oak cabinets gray (or cool grayish color like ours)
Does your house have a lot of old, construction-grade oak in it? Our house was built in 1992, and oak Merillat cabinets and molding really seemed to be the standard. One thing we know is that getting rid of the golden oak color in your home can really help update your space.
In the past, we have gone over how we have painted other oak items in our home. From our fireplace mantel to doors in our basement, we have used a similar technique to help get rid of the oak color. We have even done our kitchen cabinets and all the molding in our upstairs following the steps described below.
The biggest difference is that all of those above DIY home projects turned our oak into modern white counterparts and this time we wanted to create a nice blue-gray cabinet for our bathroom vanity.
*Disclosure: I only recommend products I would use myself and all opinions expressed here are our own. This post may contain affiliate links that at no additional cost to you, I may earn a small commission. Read full privacy policy here.
Tips and tricks to painting bathroom vanity gray
Here are some questions that we hope to answer through this DIY bathroom vanity tutorial
- How to paint cabinets without sanding?
- What kind of paint to use on bath vanity?
- How cheaply can these bathroom vanity makeover be done?
- Can you just replace the bathroom vanity top? What are your budget-friendly vanity top options?
- How to easily add hardware?
Here is a video explaining some of our bathroom cabinet painting steps!
Redoing a bathroom can be budget-friendly
The good news is that painting a bathroom vanity can go pretty quickly and can be pretty inexpensive. We ended up doing more to this small bathroom (and another one in the basement) to help completely modernize it. However, simply getting rid of the oak cabinets through our easy painting technique is a great first step and one that you will hopefully be confident to take on after reading this.
Make sure to ask any questions at the end (we love getting comments from our readers and helping out DIY nuts like ourselves). Sometimes, the only thing holding you back from completing a DIY project is just fear. I am telling you to just go for it. Paint can always be painted over.
Do you need help deciding what color of paint to use for your cabinets or walls?
We recently just tried Samplize and it totally beats having to buy individual paint samples. These 12″ x 12″ samples will get shipped directly to you and save the hassle of clean-up (we loved that). Check out the brands you can get here. You can also check out our post, see our review and hopefully get the answers to those frequently asked Samplize questions.
How to paint cabinets without sanding (or I guess I should light sanding)?
Don't worry the sanding part is really not bad and will take you only a few seconds which we will explain in the step-by-step tutorial.
Now our plan still involves seeing the grain a little through the paint. It really doesn't bother us, therefore it is really not worth the time to use something like these fillers and oil-based primer that I see other DIY bloggers or pro painters recommend.
*Using the right primer one of the most important things. We normally only use this primer for all of the projects, so I cannot attest to other latex primers. This is also not an affiliate link as we just love using SW products. I have also read about people using oil-based primers with a lot of success. However, we have had great success with latex-based primers and paints and really have not had the need to stink up the whole house!
If you are looking for a kitchen cabinet makeover. See how we remodeled our kitchen cabinets using a similar technique.
We also recently repainted some of our white painted kitchen cabinets using a different type of paint. We will never use any other paint again to paint cabinets!
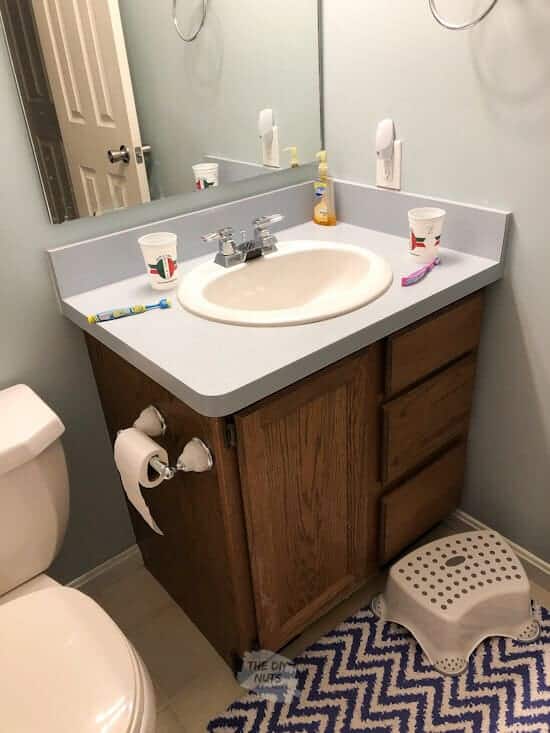
Our "before" bathroom

Tutorial on how to painting oak bathroom cabinets
1. Take all doors and drawers out. Take off hardware (hinges as well). Place in a bag and label clearly. You also want to put a piece of painter's tape inside the drawers labeling where they came from.

2. Lightly sand with fine sandpaper to rough up the gloss on our current surface. I think this always allows the primer to stick a little better.

3. Use a deglossing agent with a rag to wipe down cabinet, drawers and doors. Make sure to completely clean all parts. You do not want anything greasy leftover.

4. Tape any spots that you feel you will not be able to trim well with a brush. I only taped along the wall where the cabinet and wall meet. Use your fingernail or an old credit card to really push the tape on.
Tape drawer fronts on the back so that you can prime and paint the backs of the drawers easily.
5. Use a primer with a brush first in areas that can't be rolled. The biggest thing is to make sure you cover everything, while not having drips.
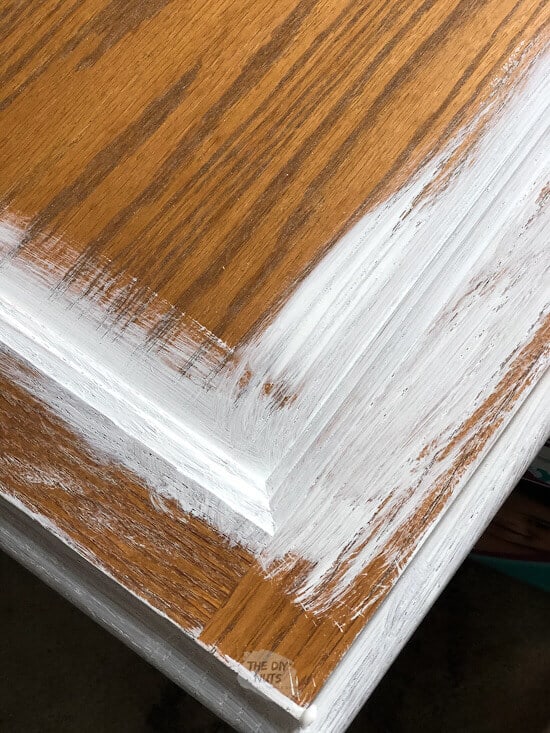
If your cabinet doors or like our standard construction grade cabinet from the 1990's make sure to not have extra drips in the grooves or ridges.

6. Once you complete the door, just go back and check to make sure that you give a quick brush to any spots that appear to have too much. Continue to also prime the spots a roller could not go on the cabinet frame back in the bathroom.
7. The large flat areas can have primer applied with a small foam roller. The same principle applies to full coverage while making sure not to have drips.
8. Let your primer dry. The front and back of the front of the drawers should be able to be painted/primed at the same time because you should be able to prop them up. Once the primer is dry, you will have to flip the door over and do the backside.
***Tip: Saving your brush and roller in a Ziploc bag is a great tip so that you can save the hassle of having to wash your brush every time. ***
9. Primer should be dry in a few hours (I believe Sherwin Williams says 4 hours). However, I also call myself the naptime painter so I always paint in steps during naptimes and just continue the next day.
Therefore, I did the back of the door later that day, but waited to start with my semi-gloss latex enamel paint until the next day.
I am normally a Sherwin Williams paint girl (still am), but was able to score this Behr latex enamel for pretty cheap and I thought about giving it a try. Stayed tuned for my full review in another post soon.
If you do not want to use this inexpensive latex enamel , then I recommend using Sherwin Williams Proclassic line. That is what I have used for all other trim and cabinet painting in our house. You would be surprised at how long our kitchen cabinets and moldings have held up with 3 children banging into them.
However, the price is the main reason I decided to give this Behr a try. I was able to get a gallon for around $30 because I had a coupon and they were already on sale. I will have to update this post next year with how the cabinets are holding up with this brand of paint.

10. Following the same brush and roller procedure, apply the latex enamel paint. Let dry and then add a second coat to the drawers, doors and cabinet base. If you think you need a third coat, feel free.
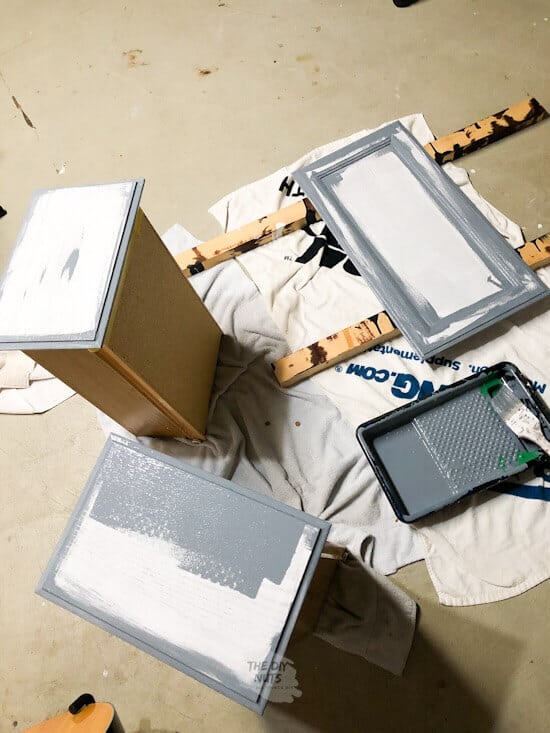
11. Make sure that you evenly paint the sides and all parts of the bathroom cabinet. It is very easy to miss a spot. Looking at your cabinet and vanity parts from all angles, helps you see if you missed any spots.

12. Repeat the steps with the gray paint at least twice. You may decide to add a third coat depending on how thickly you applied the paint.

We will talk more about how we replaced the old laminate counters a future post. But once the counter was completely redone we were able to complete the following makeover ideas.
Add new hardware to complete your bathroom vanity cabinet makeover
Before, putting our brass hinges back on, I used silver spray paint to update the look and match our hardware. You can also purchase new brushed nickel hinges (of the finish of your choice) pretty cheaply.
We let our doors and drawers cure for a few days. Once we felt the paint was cured enough, we decided to add our cabinet pulls. I absolutely love our larger pulls we added. Normally, we do not pick larger hardware but thought this was a great way to cheaply modernize our bathroom vanity.
Tip! Use an old piece of cardboard so that you can stick the screws in so it is easier to spray the heads with the silver spray paint .

I purchased these large pulls from Amazon and while they are only plated brushed nickel, I could not beat the price for our kid's bathroom makeover. They came very well packaged with limited scratches or blemishes. I think ordering 5 this size from Amazon was cheaper than anything I could have found at a big box store.

Also, don't forget to check out World Market for different hardware options. I love using their hardware on our refurbished furniture projects.
You still should be very careful, as it can take paint 30 days or so to really cure or harden. After about 5 days, I also added plastic drawer and door protectors on the inside to limit the banging of the drawers.
How much did the bathroom cabinet makeover cost?
If you are like us, then you only had to buy paint and hardware. If you assume that you already have brushes, rollers, etc. then this bathroom vanity makeover was done for under $75 and I have a lot primer, paint & deglosser leftover to use for future projects.
What about the bathroom countertops and sink?
So we could have left the blue laminate countertop, cleaned it up a little and been all done. You can see how we only painted the bathroom vanity in the basement. We didn't think we really needed to do much more to update the small space.
At the time, it wasn't worth spending more money on bathroom upgrades (even if they are DIY projects). I still love the look of this freshly painted bathroom vanity!
Decide on the type of countertop and sink
However, the upstairs bathroom was a little different. This bathroom vanity painting project started the snowball effect into more DIY bathroom projects. This tends to be a trend around here.
Read more about how a new screened-in porch turned into building a corner shelf and then into a fireplace mantel painting project.
Another note about replacing the countertops is that premade countertops are not that expensive, so we figured we would try to completely update the vanity.

I was also contemplating painting our counters with this Rustoleum Countertop Transformations . However, again kids can do damage, and I just didn't know how well they would hold up and the price was very similar to just getting a whole new countertop.
We decided to buy a premade countertop with sink from Home Depot. We ran into a little bit of trouble in our choices because we knew that we needed the backsplash pieces to go on the back and side. Did I mention this is our kids' bathroom? We knew that we could not have a small lip like a lot of the models have.
I really just wanted to purchase a white cultured marble rectangular sink shape (Home Depot) and countertop. Not only are they inexpensive, but I thought it would work to help brighten a small space.
However, we could not find one that we seemed would work for our corner bathroom vanity cabinet. Most of these simple and inexpensive white sink tops (Amazon) that were interested in only had a small lip on the back.
If you don't have kids or you have a stand-alone vanity that you have painted, the two link options from Home Depot and Amazon may be a great choice for you.
Kid-friendly sink top and protection (we hope)!
Since this bathroom will mainly be used by our children, we went with this countertop and sink and ordered an extra side backsplash for the corner .
Soon you will be able to read more about how we removed the old countertop and sink and add this one to our painted cabinets in this post.
We also had to purchase a new faucet. We went with a highly rated, but under $100 modern looking Kohler faucet in brushed nickel . I love the new trend of gold hardware, but we don't have any in other rooms, so we just went with the safe brushed nickel.
Here is a recap of how to redo a bathroom vanity cheaply
- Paint vanity cabinets (it isn't as hard or as inexpensive as you would think).
- Add new hardware.
- Replace countertops, sink and faucet (if you want).
- Frame out old construction mirror, purchase a new one or leave your current one.
- Consider painting old light fixtures or there are so many inexpensive ones out there that you buy.
- Add some new fun accessories or repurpose what you have.
- If you need to cover up spot inside the inside of the cabinet, using a fun shelf liner can really add some fun inside your cabinets. Not to mention, extra protection from future mishaps. I know we need that with our tribe.
Don't forget about the inside of your newly painted cabinets
Funny story about our shelf liner. I meant to order contact paper for a file cabinet makeover that I will be doing soon. I love this pattern (at the time I thought paper). However, it was a textured shelf liner …
I should totally have read the whole product description. For the price, I knew that would use it somewhere else and it wasn't worth returning. Inside our bathroom vanity was the perfect place!
One last before picture of these ugly oak cabinets

Yes, I am so happy to share with you the updated bathroom look.
So drumroll…
The after bathroom cabinet makeover
Painting our bathroom vanity was one of the best and cheapest ways to refresh our small bathroom.
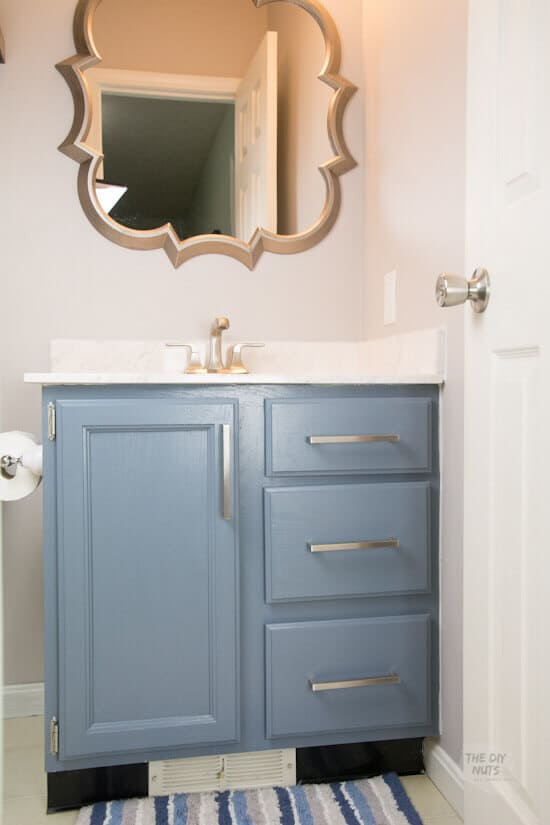
From the Charcoal Blue cabinets to our SW Grayish walls we love how the bathroom came out. The only thing we need to do is spray that vent black! (Thanks for the comment and suggestion from one of our readers).
What other tips do you have for painting a bathroom vanity? We would love to hear about your DIY projects!
Read more: Check out 13+ other DIY projects where we have finally gotten rid of most of the honey oak in our home!
Follow us on Pinterest or Facebook for more DIY inspiration!
Best Paint For Bathroom Cabinets
Source: https://thediynuts.com/how-to-paint-bathroom-vanity-cabinets/


Tidak ada komentar:
Posting Komentar